It is my personal tradition to celebrate my birthday for as many days as I am celebrating years. Let’s just say that I have well over a month’s worth of partying to enjoy this year! ????
The tradition came about on my 30th birthday, when I had some big plans that got canceled + I ended up sitting at my desk, working, all day instead. It was disappointing until I got over it and realized I had a WHOLE YEAR to celebrate this next trip around the sun, and that the way that 10,950th day on Earth was spent couldn’t possibly ruin that. The occasion also brought to light the notion that it had actually always been impossible to squeeze all of the important people, exciting treats, small moments + general specialness into a single day. And so I stopped trying, and vowed, instead, to spend much more time celebrating life – in all the little ways + a few opulent ones – in general.
This week, I’ll start my birthday month+ celebration and there are lots of special things in store. A birthday trip starting TODAY, for one. And, these Secret Stash Candy Bars are coming with me as a snack (because you KNOW that a month of mini birthday celebrations for me is NOT devoid of SNACKS!) A crunchy cookie layer, topped with a creamy date-coconut caramel, and bathed in dark chocolate. Simple, and baller.

Candy bars like this are pretty much my FAVORITE THINGS to make. And, they’re an absolutely effing perfect pocket snack for wintertime. They’re packed with all the ingredients our bodies need to nourish in the cold. Dates are a super-food source of carbohydrates, minerals, and nutrients, the coconut in the caramel + in the cookie base works to keep our bodies energetically cool + prevents inflammation(even though we’re generating heat by moving.) The innate bitterness of the dark chocolate also helps reduce inflammation, keeps the digestive system balanced and the channels of the body running clean + clear, and the nuts and oats in the base serve as a crunchy, satisfying punch of power to keep us moving all day long.
The crunchy cookie base is made of dates, oats + nuts and then baked until golden, and topped with a creamy coconut-date caramel before being coated in chocolate. Did I mention that they won’t melt or freeze in cold weather? If you like Date Bombs, you’re really going to love Secret Stash Candy Bars.
Now, there is a bit of process involved. This isn’t an all-day process, it’s just a patience-is-a-virtue process. The technique is easier than one might think but it’s critical to follow the instructions as they’re set out below and don’t stray. And once you’re done, you’ll have a stash of candy bars that will last a good bit. (21 candy bars last us a couple of weeks around here.) I’ll be sharing a little reel of some of the technical details this weekend on my Instagram account – keep your eyes peeled there if you’re curious to see this one in action!
At the risk of ruining the fun because YES YOU’RE MAKING CANDY OUT OF NUTRITIOUS INGREDIENTS, I’ll keep this week’s newsletter short. Suffice to say I’m a huge proponent of eating candy bars on the trail, and even more so when you can make them yourself. Without further ado, here we go!
This easy little candy-making process is fun + straightforward, but it’s REALLY important that you follow the instructions! A few notes to keep you on track:
Flavors are FUN, yes, but they also are the mechanisms by which our bodies nourish themselves. Flavors basically tell our bodies what the food is giving us – on a nutritional and energetic level. Our bodies then prepare enzymes to break those components down, assimilate them, and turn them into fuel for our vibrant lives. We can’t eat just one flavor and get all of the things we need, so learning to track the flavors in our foods helps us to be sure that we’re really getting all of the things we need in our meals. This particular recipe has three of six flavors. The more flavors we can enjoy in any meal or food, the happier and more balanced our bodies will be. If you’re wanting to learn more about how the flavors we eat fuel our bodies – energetically and nutritively, check out this little blog post.
Wonka, WOULD.
Preheat the oven to 350°F. Grease the inside of an 8 x 8 inch square pan with coconut oil, then line with parchment paper and grease the paper, allowing the paper to hang over two of the sides like a sling. Set the pan aside.
In the bowl of a food processor fitted with the blade attachment, pulse the oat flour until very fine. Add the pecans, arrowroot powder, dates, and sea salt + pulse to combine. Add the coconut oil and pulse again until a crumbly dough forms. Press the mixture into the prepared pan, patting it evenly with a spatula or with your hands. Transfer the cookie base to the oven and bake for 20 – 25 minutes, until fragrant + golden brown. Remove the cookie crust from the oven and allow to cool while you prepare the rest of your candy bar layers. While the cookie crust is baking, clean your food processor bowl.
In a medium-sized saucepan, combine the ⅓ cup coconut oil, coconut cream, vanilla, and sea salt. Bring the mixture to simmer over medium heat then add the dates + allow to simmer for 1 minute before removing the pan from the heat and allowing the mixture to steep for 10 minutes or so. Transfer the entire date mixture to the bowl of a food processor fitted with a blade attachment. Pureé the mixture for 3 – 5 minutes, until it’s very creamy and thick. Be patient, it may take a minute to reach the desired caramel-y consistency! Scrape the date caramel onto the cooled cookie crust and spread evenly with a spatula or offset spatula.
Lastly, warm 3oz of chocolate in a small heatproof bowl over a double boiler, or by zapping it quickly in the microwave in 30-second bursts. DO NOT EXCEED 30 seconds in any given burst as you’ll risk overheating the chocolate. As soon as 70% of the chocolate is melted, stop zapping or heating and stir the chocolate gently. This will allow the ambient temperature to melt the chocolate the rest of the way. When the chocolate is melted and smooth, pour it over the date caramel and smooth the chocolate with an offset spatula to create an even layer. You can also tilt + turn the pan so that the chocolate runs over the candy bar base.
Transfer the chocolate-coated candy bar base to the fridge and allow to set for at least 2 hours. This allows the chocolate and caramel to harden enough to cut the bars.
When the chocolate + caramel have been set sufficiently, it’s time to cut + finish your candy bars!
Use a knife to loosen all along the edge of the pan, between the parchment paper and the pan itself. Then, use the parchment paper sling to remove the candy bar block and transfer it to a cutting board. Using a sharp knife (preferably a 8 – 10″ chef’s knife), score the candy bar block into thirds, then turn the pan and score it into 7 columns. When you’re confident + content with your even scores, press the knife firmly through the candy bar to cut all the way through the cookie layer. The chocolate coating will likely crack a bit – that’s ok. You’ll now have about 21 evenly-sized candy bars!
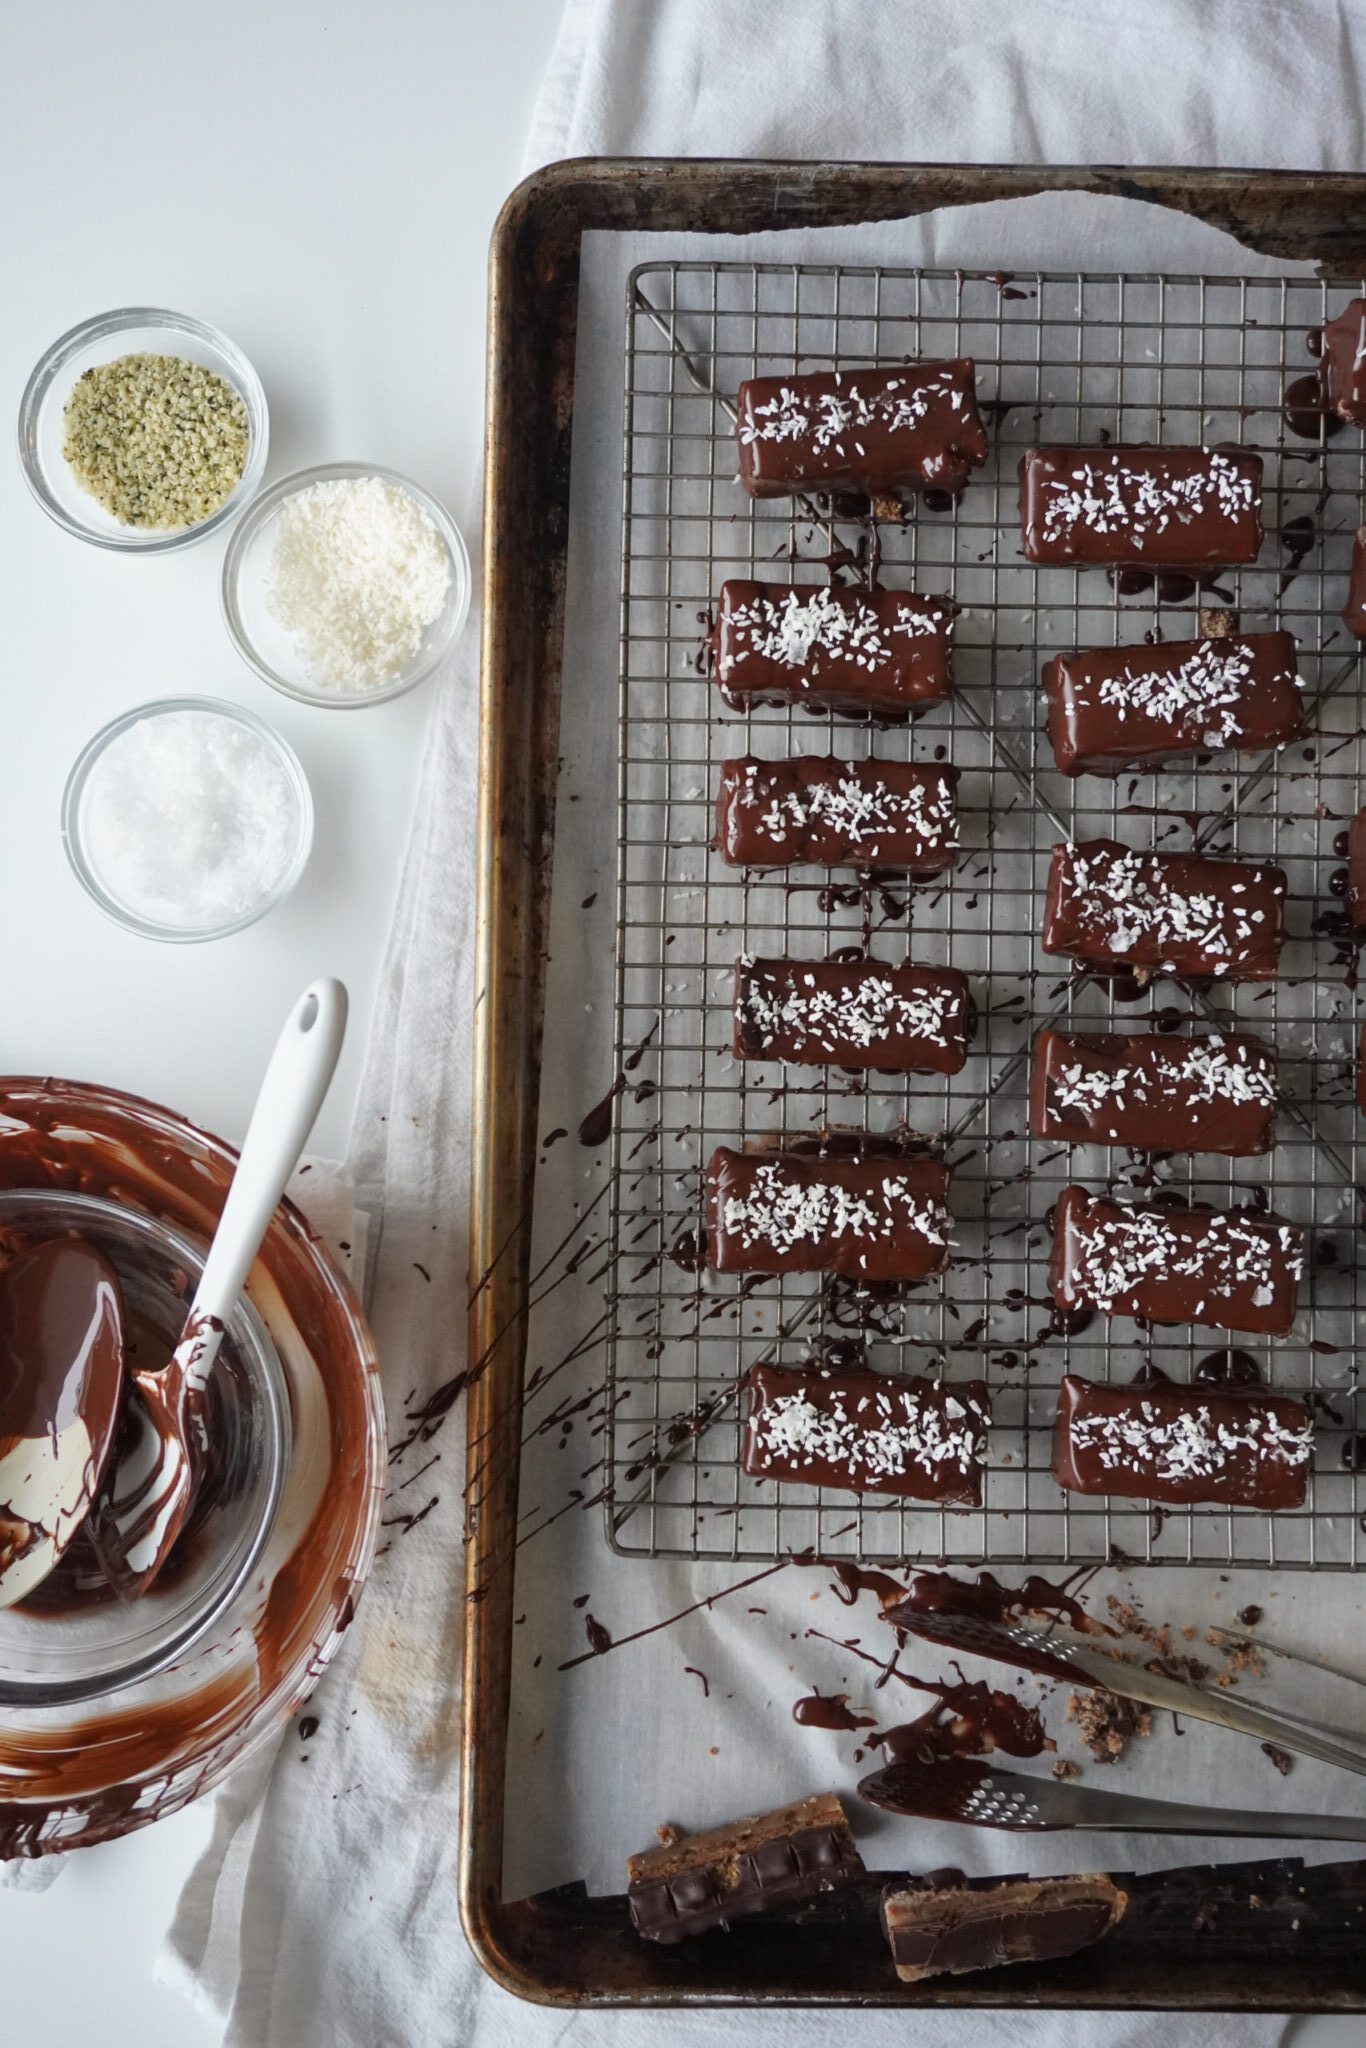
Line a rimmed baking sheet with parchment paper, then place a cooling rack inside the baking sheet. Prepare to coat your candy bars in chocolate. In a large heatproof bowl, combine the remaining 12 oz chocolate and 2 tbsp coconut oil. Fill a small saucepan one-quarter full with water and bring to a simmer over medium heat. Place the bowl of chocolate on top and stir until the chocolate is melted and shiny. Remove the bowl of chocolate and place it on a towel (to preserve the heat.)
Gather a set of tongs, a spoon, and a small rubber spatula. Take a still-cold candy bar slice with the tongs and plunk it straight into the chocolate, using the spatula or spoon to coat it in chocolate. Then, lift the candy bar out of the chocolate using the tongs. Place it on the cooling rack to drip off any excess chocolate, sprinkle the top with a bit of coconut and flaky sea salt, then move to the next candy bar slice. Repeat with all of the candy bars.
When all of your bars have been coated in chocolate, place them on a rimmed baking sheet lined with parchment paper and again transfer them to the fridge to set up. Once the chocolate is set, you can transfer them to an airtight container for storage. Keep the container in the fridge, eat and share often!